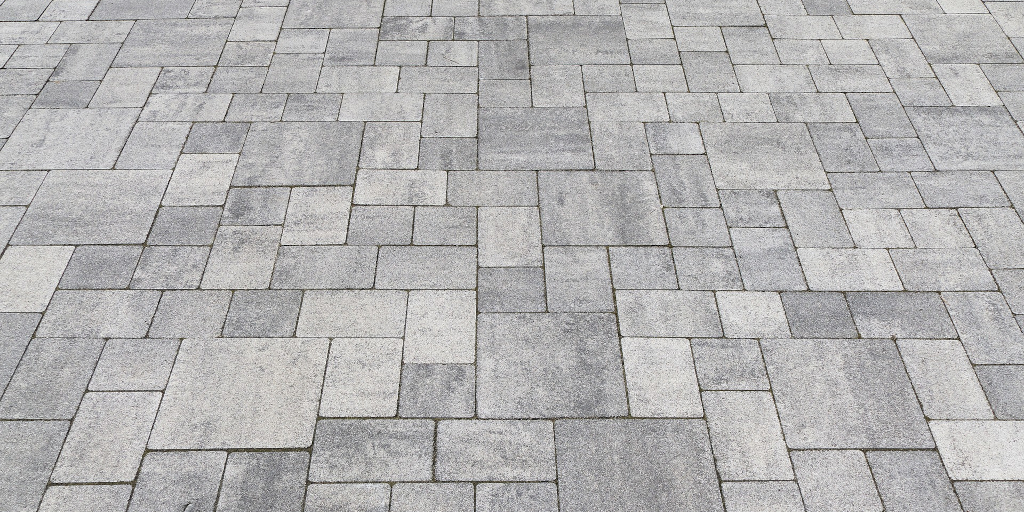
When working with pavers, there are numerous ways the individual units (blocks, bricks, tiles, stones, etc.) are arranged in a project. When putting together a patio for example, how you arrange the pavers with affect the appearance of the patio. In this article, we are going to take you on a tour of patterns for constructing paver patios. We won’t cover every pattern out there, but we will cover the basic ones thoroughly. Let’s get right into our tour of paver patio patterns.
Stack Bond
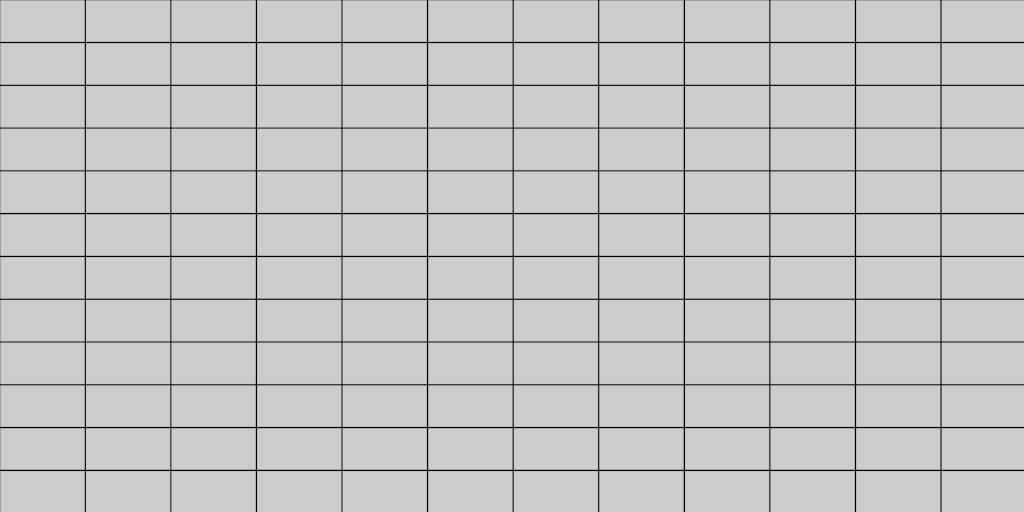
The stack bond paver patio pattern used in making paver patios is a very simple pattern. As the name implies, the pattern is formed by simply lining each of the pavers up corner to corner. In other words, simply line the pavers up in a grid-like pattern with each paver lined up exactly with the one beside it and above it. The stack bond pattern can be achieved using any group of pavers as long as they are all the same dimensions.
½ Running Bond
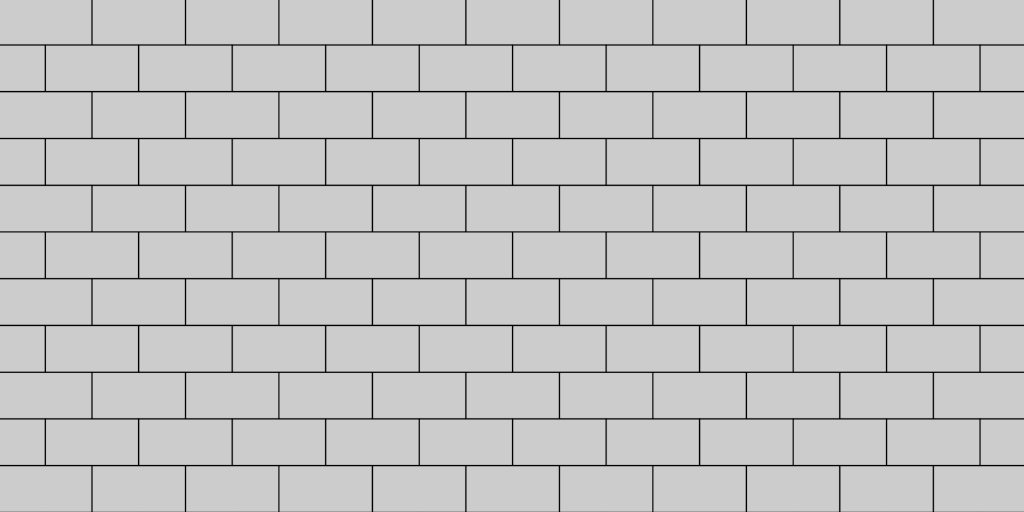
A ½ running bond pattern (also referred to simply as a running bond) is accomplished by staggering each row by half the with of the block. So if your pavers are being laid so that they are 9″ wide, you would start the first paver of the second row 4.5″ from the edge of the first block in the first row. The third row is positioned to line up exactly with the first row of pavers. This is also referred to by the term “running bond” or “runner bond” without the ½ specifying the offset.
⅓ Running Bond
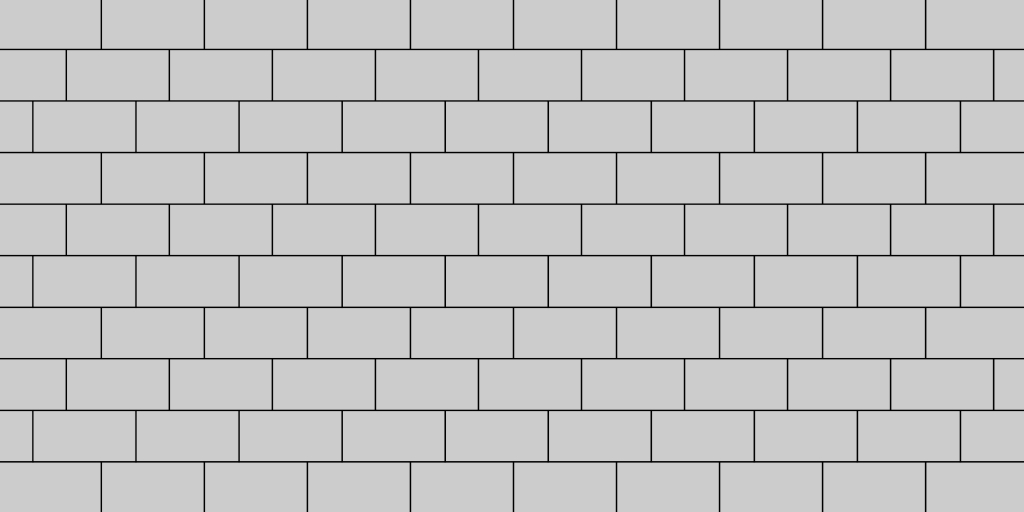
As far as simple patio paver patterns go, running bonds are straightforward to arrange. The ⅓ running bond is made by running each row of pavers such that the current row is offset by one third of the size of the paver. For example, a paver that measures 3″ x 9″ would have an offset of 3 inches (9 divided by 3) each time a new row was started. So, the fourth row would line up exactly with the the first row. The seventh row would line up evenly with the fourth and first rows, etc.
Muster K (I Pattern)
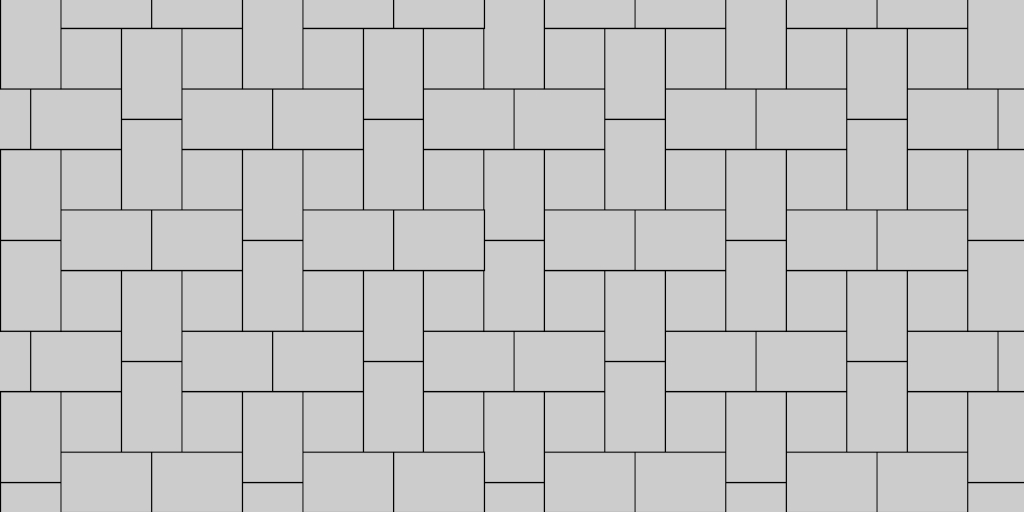
The Muster K (also called the I Pattern) is executed by using stones of two dimensions. One of the pavers is square. The short side of the other paver is equal to the measurement of the square paver while its long side is 1.5 times that. For example, if the square paver measures 6″ then the the other paver would measure 6″ x 9″. Sticking with those sample dimensions, the proportion of pavers needed to correctly construct the Muster K pattern is as follows:
- 6″ x 6″ Pavers (25-30%)
- 6″ x 9″ Pavers (60-70%)
Three Stone I Paver Patio Pattern

Next up in the tour of patio paver patterns is the three stone I pattern. This pattern is arranged using stones of three different dimensions. The stones are arranged in such a way that they form multiple capital letter I shapes. The I shapes can be seen both vertically and horizontally. The ratio of stone sizes needed to construct the three stone I pattern is as follows:
- 6″ x 9″ Large Rectangle (37%)
- 6″ x 6″ Square (27%)
- 5″ x 6″ Small Rectangle (36%)
This pattern takes a bit extra work since the edge pieces will need to be cut. But the pattern is very appealing.
Diamond (45° Stack Bond)

The diamond pattern is a paver patio pattern that we have already mentioned, only with a couple of “twists”. The pattern is basically the stack bond pattern mentioned above. However instead of using using rectangle-shaped pavers and lining them up in horizontal rows, you use square pavers and rotate the work 45°. This creates a pattern that looks like diamond shapes. This pattern can be constructed using any size paver as long as it is square.
Basket Weave
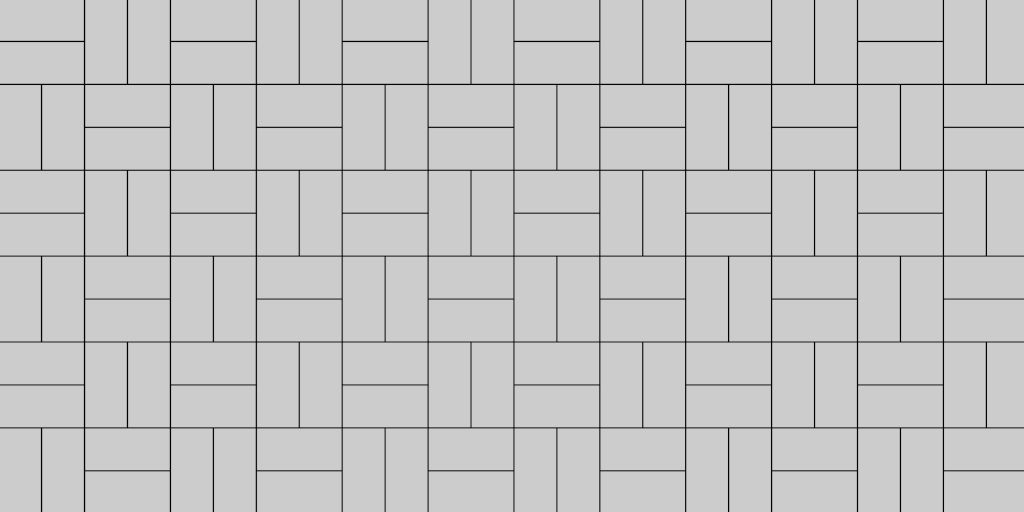
The basket weave paver pattern looks just as the name implies; like the the texture of a woven basket. There are a number of variations that can be achieved when it comes to this pattern. The standard basket weave pattern is accomplished by using pavers that are all the same dimension and whose length is double their width. For example using 3″ x 6″ pavers would allow for a standard basket weave. The pattern is formed by laying two pavers with the long side running toward and away from you then the next two left to right one on top of the other. Then the next two get placed in the same manner as the first. Each time a new row that gets started, the orientation gets reversed. As mentioned though, there are several ways to get a basket weave pattern.
1:2 Basket Weave
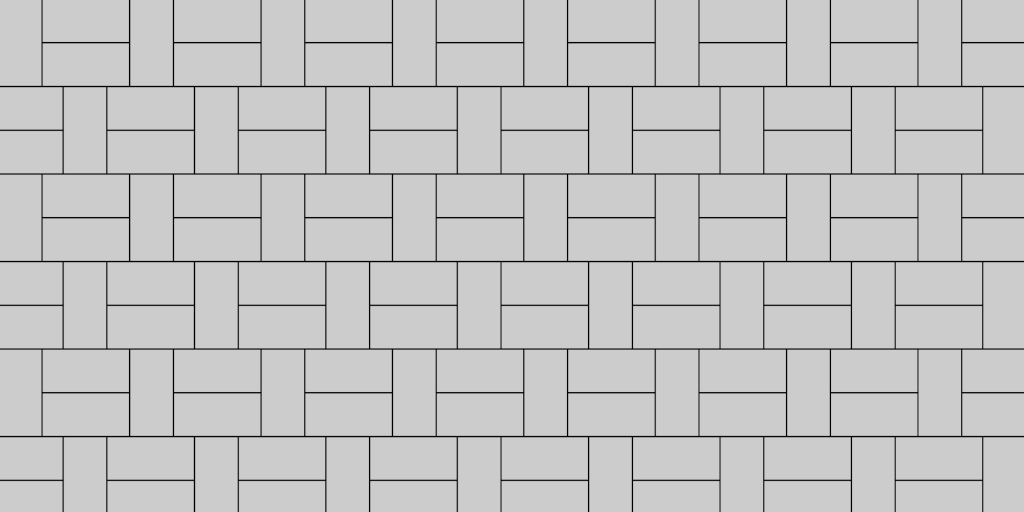
The basket weave pattern doesn’t have to be laid exactly like the pattern mentioned in the standard 2 to 2 alternating pattern. The 1:2 basket weave uses pavers that are twice as long as they are wide like the standard pattern. But instead of orienting two pavers in each direction, one position only gets one paver and the other position gets two.
1:3 Basket Weave

The one to three basket weave pattern looks like a woven basket just as a standard basket weave does. But it is constructed using a different size of paver and the pattern is a little different. First, the pavers must be 3 times the length of their width. Additionally, the pavers are placed with one stone set oriented with the long side going toward and away and then three stones oriented in the left to right one on top of the other. This sequence is repeated and each row alternates. There is the need to cut some pavers for the edges in order to keep the pavers lined up properly. If you are going to be cutting pavers, you will want to be sure you have a diamond blade for cutting stone pavers.
2:3 Basket Weave
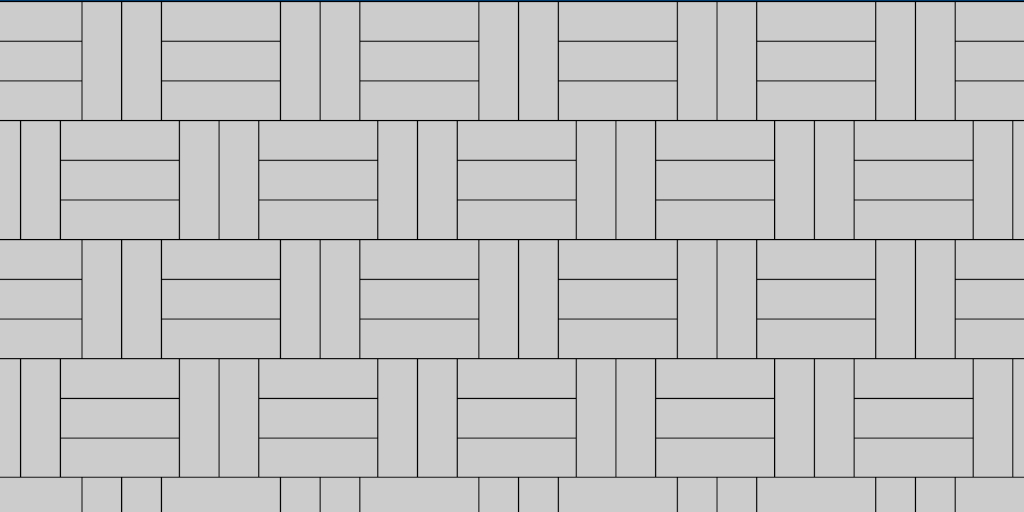
The 2:3 basket weave paver patio pattern is achieved by using pavers that have a length of 3 times their width. In this case, the pavers are laid with two pavers side-by-side and then directly adjacent to those are three pavers stacked one on top of the other. The pattern is repeated for each row. When a new row is started, the paver groups (the two side-by-side pavers and the three stacked pavers) switch places. Thus, producing the woven look.
3:3 Basket Weave
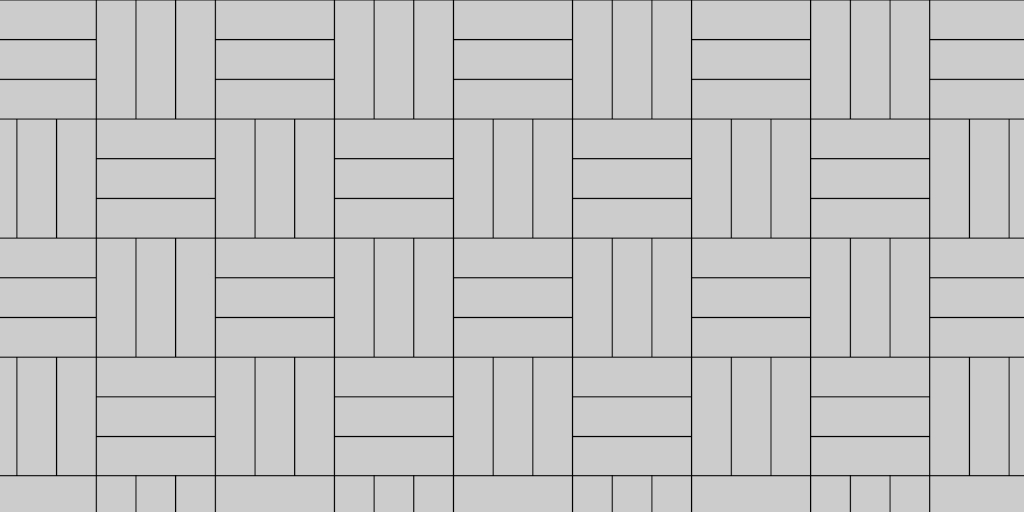
When laying out a 3:3 basket weave paver pattern, you use pavers that are three times as long as they are wide. The pattern is created by placing the pavers in groups of three. The first group are laid either vertically or horizontally and then the next group is placed in the opposite orientation. The groups’ orientations alternate to create a pattern that mimics a woven basket just as the name implies.
1:4 Basket Weave
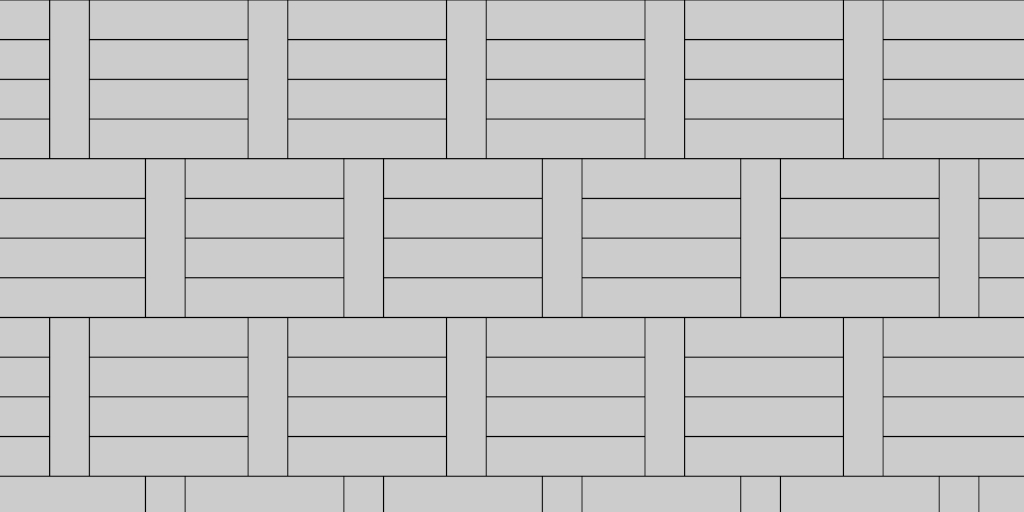
The one to four basket weave pattern looks like a woven basket just as a standard basket weave does. But it is constructed using a different size of paver and the pattern is a little different. First, the pavers must be 4 times the length of their width. Additionally, the pavers are placed oriented with the long side going toward and away and then three stones oriented in the left to right direction one on top of the other. This sequence is repeated and each row alternates. There is the need to cut some pavers for the edges in order to keep the pavers lined up properly.
2:4 Basket Weave
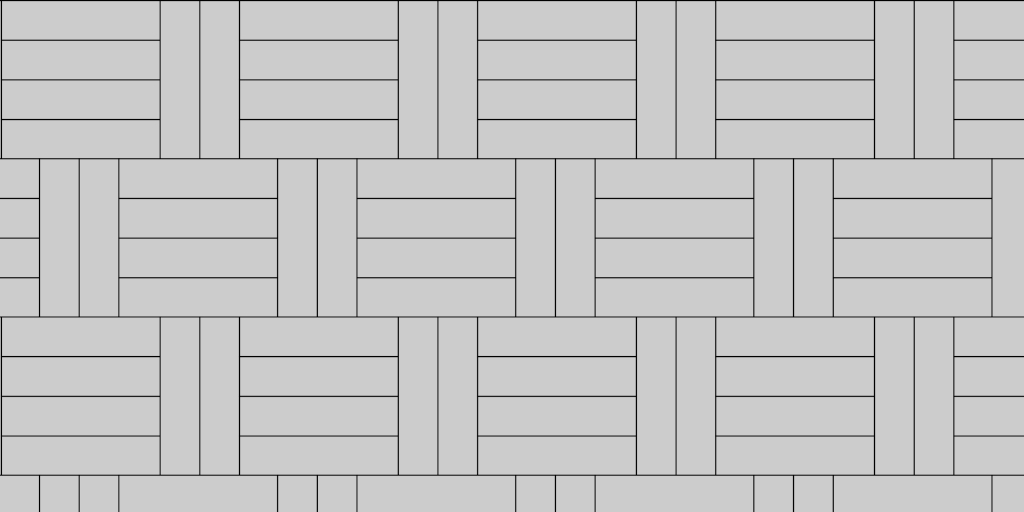
The 2:4 basket weave pattern is achieved by using pavers that have a length of 4 times their width. In this case, the pavers are laid with two pavers side-by-side and then directly adjacent to those are three pavers stacked one on top of the other. The pattern is repeated for each row. When a new row is started, the paver groups (the two side-by-side pavers and the three stacked pavers) switch places. Thus, producing the woven look of which the name is indicative.
3:4 Basket Weave

As with all the other basket weave variations, the 3:4 pattern reflects that number of pavers in each of the two groups used to create the look of a woven basket. In the one group, there are 3 pavers placed together with the long sides touching. We’ll refer to these as an A set. The other group is a group of four pavers arranged so that the long sides are next to each other. The groups oriented this way, we will label as B sets. The first row can be started with either an A set or a B set and the set may be placed so that the long lines run either direction toward-away or left-right. The next set is placed using the opposite set that was used just prior to it. So, if you started with a B set (which has four pavers in it), then you would use an A set (consisting of 3 pavers). This set gets oriented opposite the set to its left. This series is repeated alternating sets until the row is complete. Each new row begins with the set opposite the row below it.
4:4 Basket Weave
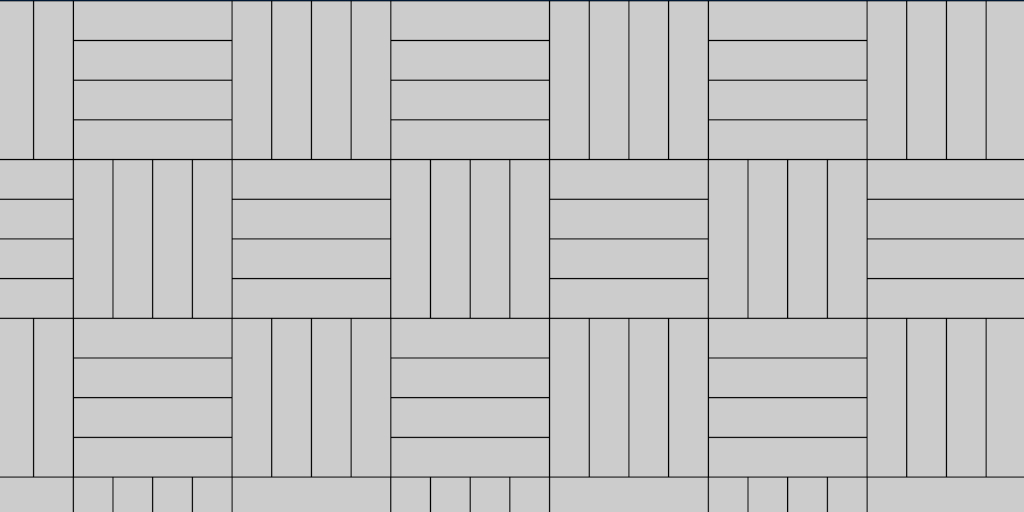
When laying out a 4:4 basket weave paver pattern, you use pavers that are four times as long as they are wide. The pattern is created by placing the pavers in groups of four. The first group of pavers are laid either vertically side-by-side or horizontally stacked one on top of another and then the next group is placed in the opposite orientation. The groups’ orientations alternate to create a pattern that mimics a woven basket just as the name implies. Once a row is finished, the new row begins using the same technique, only the orientation of the stones is switched.
Five Stone
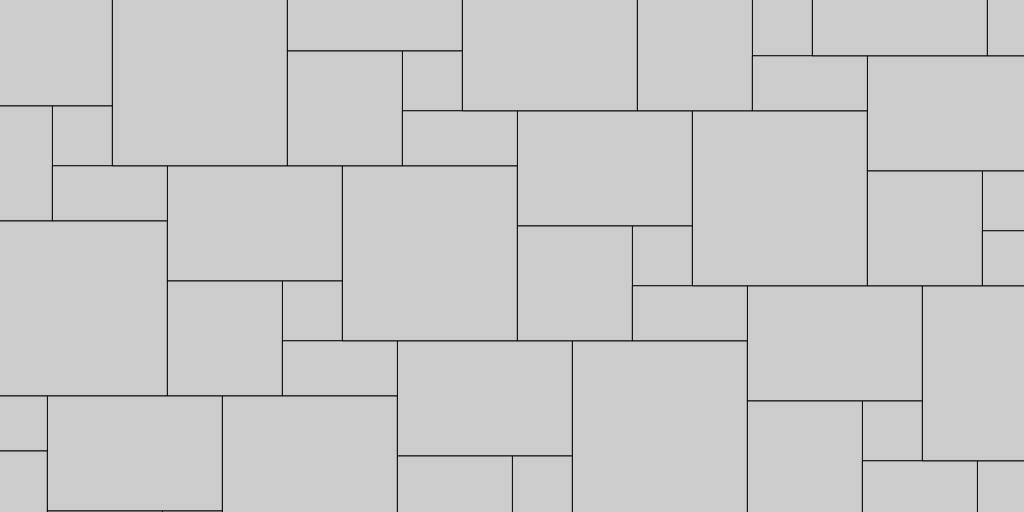
The five stone pattern, as indicated by the name, uses five different stones and is a remarkable pattern that is not as complicated to arrange as it looks like it is. The pattern uses the following paver sizes:
- 4″ x 4″ (Small Square Approximately 4%)
- 4″ x 8″ (Small Rectangle Approximately 8%)
- 8″ x 8″ (Medium Square Approximately 16%)
- 8″ x 12″ (Medium Rectangle Approximately 32%)
- 12″ x 12″ (Large Square Approximately 43%)
The easiest way to explain the layout is as follows. Begin with an 8″ x 12″ paver and place it in the upper left corner of the area to be paved. Just to its right place a 12″ x 12″ paver next to it. Then, use a 8″ x 8″ and place it directly below the 8″ x 12″ paver left aligning it with that stone above it. Next, place a 4″ x 4″ stone in the space between the 8″ x 8″ and the 12″ x 12″ pavers. Now take a 4″ x 8″ stone and place it in the remaining space located to the right of the 8″ x 8″ paver and directly below the 4″ x 4″ stone. This leaves you with about 8″ of the 12″ x 12″ left on the bottom and the full 12″ side exposed on the right. Starting just below the remaining part of the 12″ square paver, begin your next sequence and arrange the pavers the same way. As you reach the edges of the area you are paving, you will need to cut a few stones to fill some of the gaps on the edges. However, Your paver patio gaps will will often times be able to be filled using an existing stone from your supply.
Herringbone

Herringbone patio paver patterns are ones that truly get noticed. These patterns can be completed using virtually any rectangle shaped paver. There are a couple of variations and we will mention them. The patterns vary in complexity but once you get into a rhythm placing the pavers it goes quickly.
Herringbone 90°

The first variation of the herringbone pattern is the 90° variation. If the area being paved is a rectangle, using the 90° herringbone variation will reduce the number of cuts that will be required. Begin your pattern at a point where there is a 90 degree angle. If the is not one, you can place your first two pavers such that they create one for you from which to work. Place your first stone and your second stone so that they create an L-shape. Work your way out from that corner systematically. Creating courses of pavers that alternate (the pairs of pavers will look like nested L’s). Repeat the pattern until the area is completely filled with pavers.
Herringbone 45°
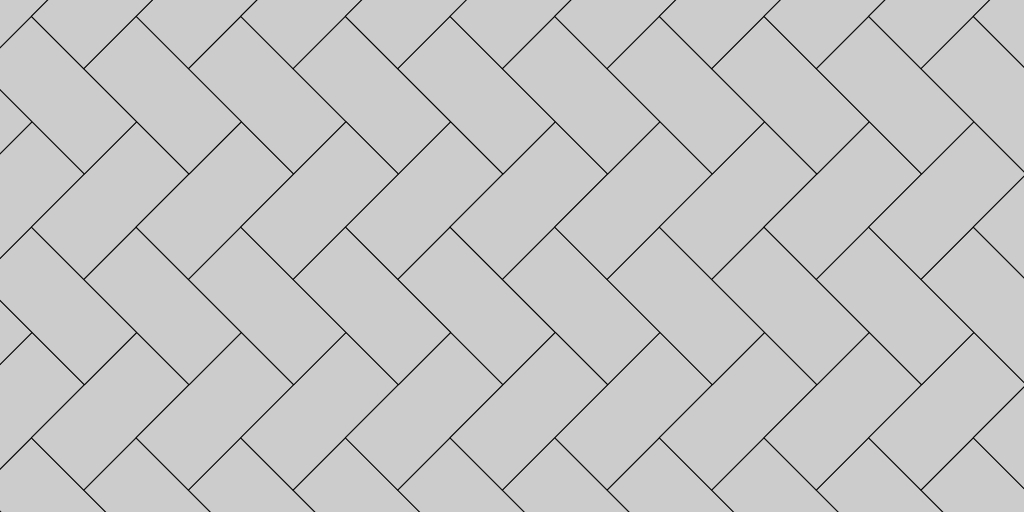
The other variation of the herringbone pattern that we will look at is the 45° variant. It works exactly like the previous one except for the pattern is rotated 45°. This version of the pattern requires considerably more cutting. This is because when you get to the edges of the area being paved, you will be left with a triangular shape that will need to be filled. Unlike the 90° version, you are not meeting a straight edge with another straight edge. Rather, you will be meeting the straight edge of the boundary with the pointed corner of a paver. This means you will need to cut the block to make it fit the space.
1:1 Herringbone

In addition to the angle at which the herringbone pattern can be arranged, the paver orientation ratio can also be varied. One to one makes use of one paver laid in one direction for each paver that is laid in the other direction. however there are other variants as well.
1:2 Herringbone
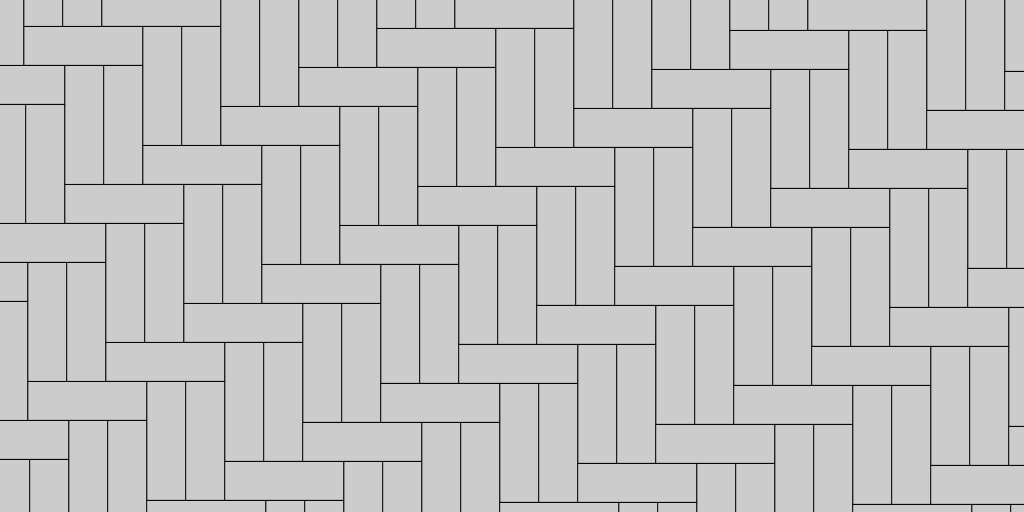
The herringbone paver pattern may be arranged in a 1:2 orientation ratio where for each paver laid in one direction, there are two pavers laid perpendicular to it creating a little different look. The process is the same except that for the pavers going in one direction, you place two instead of one.
2:2 Herringbone
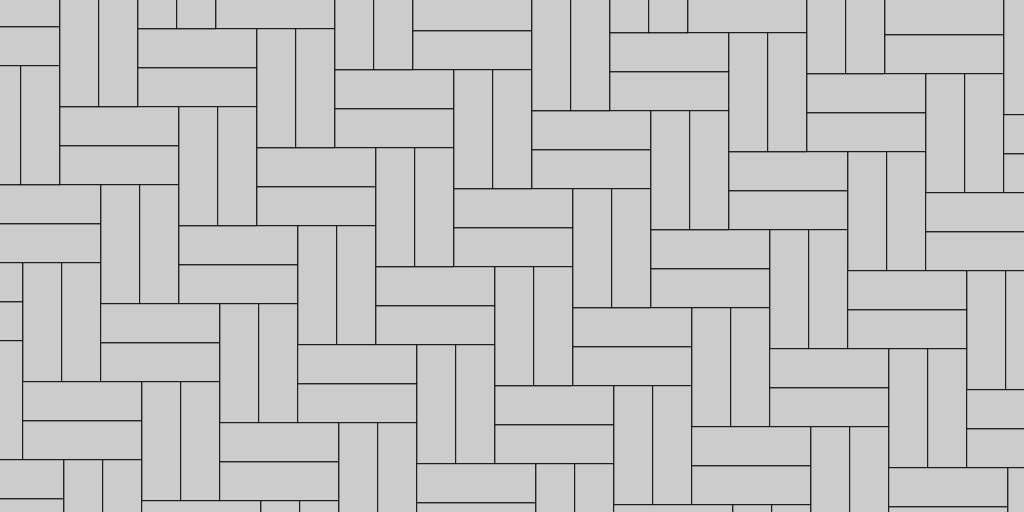
Just as the herringbone pattern may be laid out using a one to one ratio of any rectangular paver, it may also be arranged using two rectangular pavers side-by-side if the pavers make a rectangle shape after they are placed next to each other. Again, the pattern is achieved using the same process, it just gets created by doubling up the pavers in each direction.
As we have seen in out tour of paver patio patterns, there are many that can be used to create a paver patio, walkway, driveway, or other surface. We did not cover all of them in this post, but we made every effort to give you enough examples to demonstrate just how many there are. Additionally, we stayed with “patterns” and did not even journey into the “random” layouts that could also be utilized. No matter what layout or pattern you decide to make use of, knowing which options are available will be beneficial to you.

